Basic operations
Overview
After a successful login, the following workspace appears. The workspace is separated into the following areas.
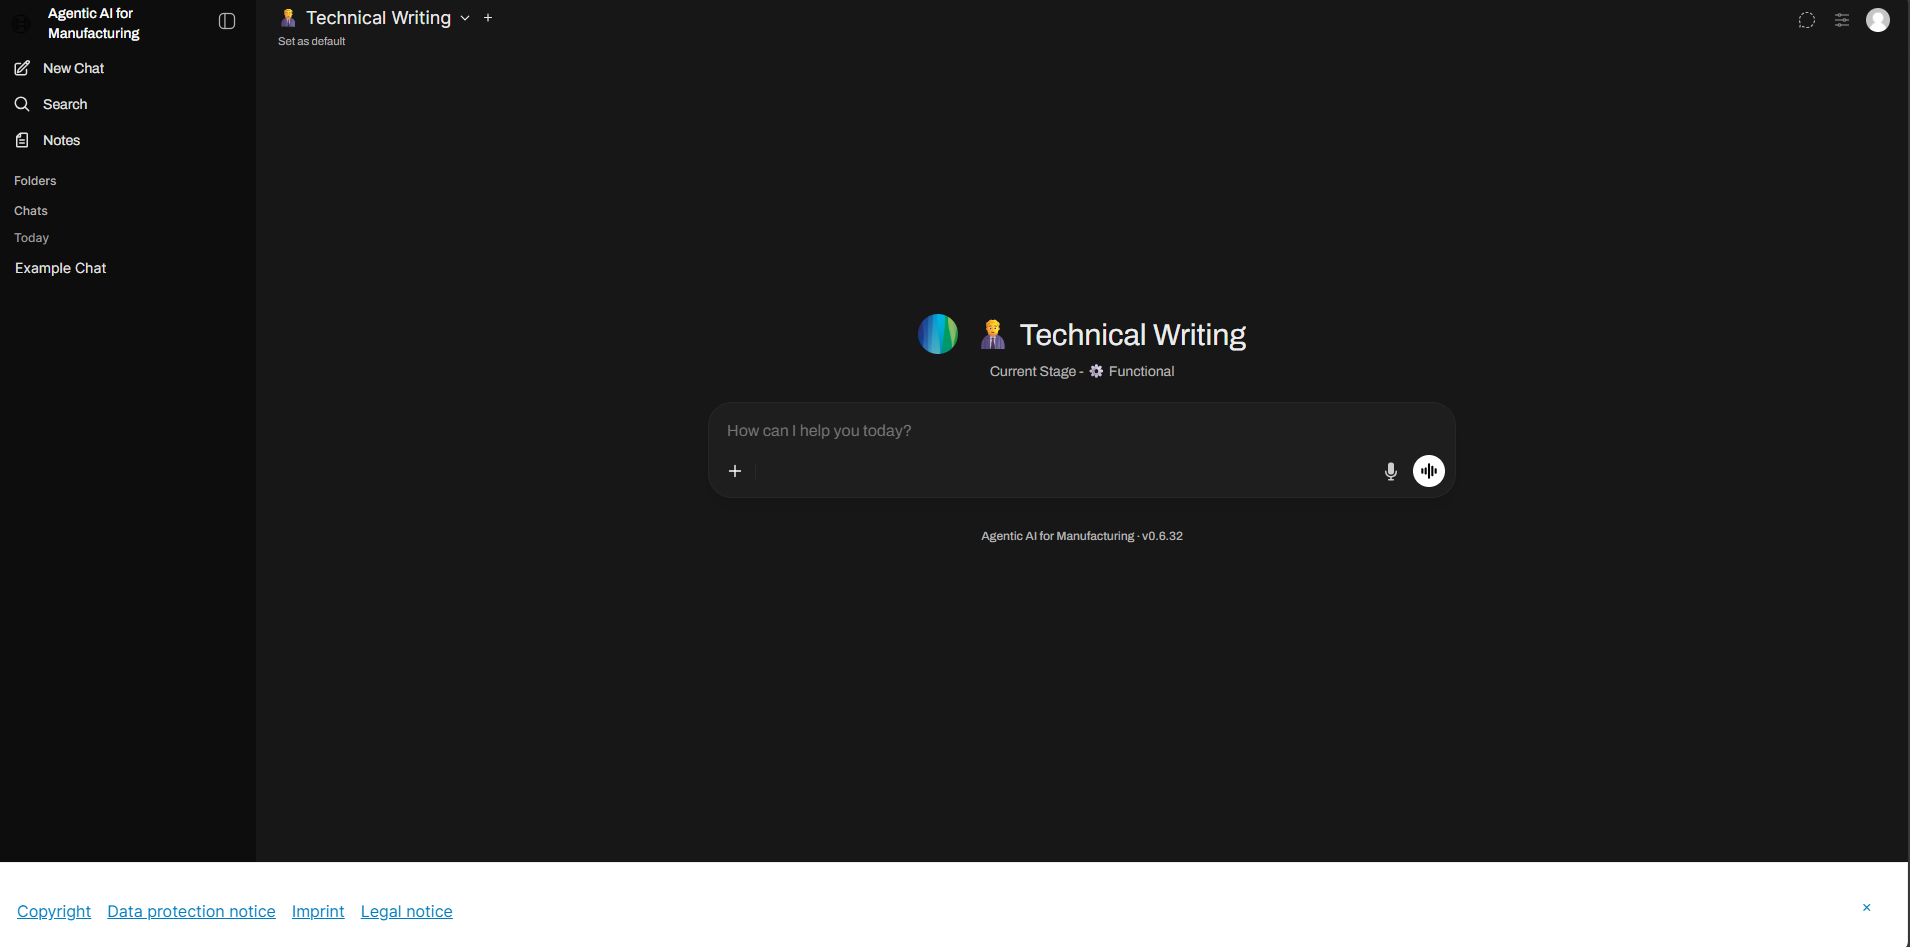
| Area | Description |
|---|---|
| Sidebar (on the left) |
There you can open a new chat or create folders or notes to manage your prompts. > To open the sidebar, navigate to the Bosch logo > To close the sidebar, click on |
| Model selector | Shows the selected model. Change the model or add a model |
| Input field | Interact with agents by typing your queries or speaking to them. Information on Agent response: Chats |
| Header | Manage Temporary chat Chat controls Personal settings |
| Footer | Copyright, Data protection, Imprint and Legal notice. |
Sidebar
| Element | Description |
|---|---|
| Open a new chat. | |
| Search for .... |
Model selector

| Element | Description |
|---|---|
| Add a new model | |
| Change the current model |
Input field
The input field allows you to interact with agents by typing your queries or speaking to them.
| Element | Description |
|---|---|
| Use to upload files or capture content to add to the website. | |
| Dictate text into the input field. | |
| Speak with the agent. |
Chats
After interacting with the agent through the input field, it gives you a suitable response.

There are different things you can do with the response of the agent.
| Element | Description |
|---|---|
| Edit the response of the agent. | |
| Copy the response of the agent. | |
| Reads out loud the response of the agent. | |
| Rate the response positive to help it learn your preferences and improve future interactions. | |
| Rate the response negative to help it learn your preferences and improve future interactions. | |
| Let the agent add more content to the response. | |
| Generates a new response relating your input. |
If you click on ![]() , you can suggest a change, let the agent try again, add details or make the response more concise.
, you can suggest a change, let the agent try again, add details or make the response more concise.
After regenerating the response you can switch between the responses with < and >. The ![]() button appears on the right which lets you delete a response.
button appears on the right which lets you delete a response.
Furthermore, you can expand the agent chat summary to see the number of inner messages, the total prompt tokens and the total completion tokens.
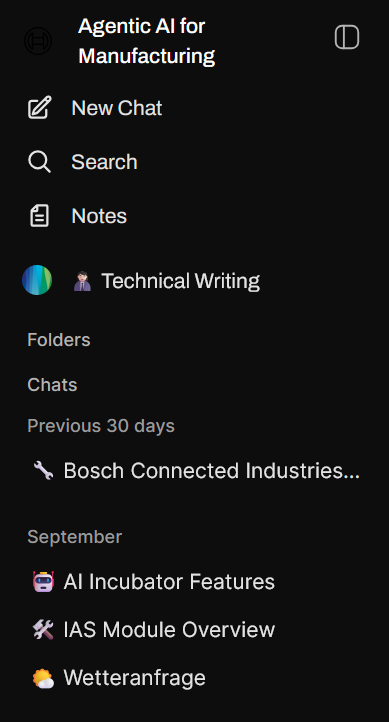
Chat history
The history of chats is saved, with an emoji representing the model appearing before each entry.
You can also access previous chats via the chat history in the menu.

| Element | Description |
|---|---|
| Share chats as links. Subsequent messages are not included. | |
| Save chat history as a JSON or .txt file. | |
| Change the name of the chat after it has been created. | |
| Securely pin chats to the top for easy access. | |
| Duplicate the chat for further use or modification. | |
| Transfer chats into folders created for organization purposes. | |
| Archive chats, making them accessible only through the search function in the menu. | |
| Permanently remove chats from history. |
Share chats
You can share your chat conversations with colleagues or download your chat in several file formats for reuse or knowledge sharing.
To share a chat:
- Select the chat conversation you want to share.
- Click on the three dots that appear when hovering the mouse pointer above the desired chat.
- Click on the Share option.
- Select Copy link.
When you select Copy link, a unique share link is generated that can be shared with others.
⚠️ IMPORTANT: Considerations when sharing chats
- The shared chat will only include messages that existed at the time the link was created. Any new messages sent within the chat after the link is generated will not be included unless the link is deleted and updated with a new link.
- The generated share link acts as a static snapshot of the chat at the time the link was generated.
- To view the shared chat, users must:
- Have an account on the Agentic AI for Manufacturing instance where the link was generated.
- Be signed in to their account on that instance.
- If a user tries to access the shared link without being signed in, they will be redirected to the login page to log in before they can view the shared chat.
Update shared chats
To update a shared chat:
- Select the chat conversation you want to share.
- Click on the three dots that appear when hovering the mouse pointer above the desired chat.
- Click on the Share option.
- The Share chat modal should look different if you've shared a chat before.
The Share chat modal includes the following options:
- Delete this link: Deletes the shared link of the chat and presents the initial share chat modal.
- Share to Open WebUI Community: Opens a new tab for https://openwebui.com/chats/upload with the chat ready to be shared as a snapshot.
- Update and copy link: Updates the snapshot of the chat of the previously shared chat link and copies it to your device's clipboard.
Searching in chat history
You can search past chats within your chat history.
1. Open the search window by clicking on ![]() in the left sidebar.
in the left sidebar.
2. Type a search keyword to find past chats related to the keyword.
3. The search results are displayed in the search window. The date and a preview of the chat appear on the right-hand side when you move the mouse over the corresponding search results.
Temporary chat
There is the opportunity to make your chat temporary. If you do, the chat won't be in your chat history and all messages are private. This option is available if you open a new chat.
| Element | Description |
|---|---|
| Indicates that the temporary chat feature is currently not in use | |
| Indicates that the temporary chat feature is currently active and can be used |
Folder
You can manage and organize your conversations by categorizing them into folders, making it easier to find and retrieve them later.
Basic folder operations
At their core, folders keep your chat list tidy.
- Moving conversations into folders: Move existing conversations into folders by dragging and dropping them. This allows you to structure your workspace to suit your workflow.
- Starting a chat within a folder: By clicking on a folder in the sidebar, you select the folder as your space to start a chat. The main chat interface updates to show the selected folder, and any new chat you start is automatically created inside this folder, inheriting its unique settings.
Creating a folder
To create a folder, you can follow these steps:
1. Navigate to the folder section in the menu.
2. Click the + next to folders.
3. Enter the folder name and configure it.
Configure a folder
It is possible to further configure the folders.
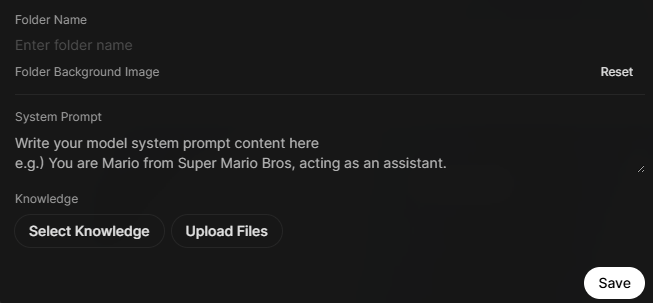
- Folder name: Configure the name of your folder to better reflect its purpose.
- Folder background image: Add an image which is displayed in the background when using the folder.
- System prompt: Optionally assign a dedicated system prompt to the folder. This prompt is automatically prepended to every new conversation and message created within that folder
- Select knowledge: Link one or more knowledge bases to your folder. Any files attached here are automatically included as context in all new chats within that project folder.
- Upload files: Upload files to add them to the folder knowledge base.